

Google Tag Manager
What is Google Tag Manager?
GTM is the tool that lets you configure the elements you want to analyze during site navigation.
- First, GTM must be installed on the site, which is done when the site is created.
- Next, you need to configure tags and triggers on the GTM account. For example, you may want to analyze clicks on a button, a phone number, or form submissions. This is covered by a tagging plan, a service we can help you with at the agency.
Who can create a Google Tag Manager account?
The Agency can create an account for its client and transfer ownership afterward.
Indeed, there are fewer restrictions within the Google ecosystem than what we see on social media platforms (for example: Meta).
By creating the account in our client's name, we simply need to add them as admin at both the account and container level so they can regain access to their account.
How to install Google Tag Manager on a site?
Installing Google Tag Manager on a site is a quick and simple task, which should be done by a developer to avoid potential side effects.
- Either the site is managed on the development side, in which case we ask project managers to schedule the installation for the client.
- Or the site is not managed on the development side, in which case we ask the client to contact their developer to install GTM.
Once the Google Tag Manager account exists, we only need to retrieve the code to pass it to the developer.
To do so, simply click the Google Tag Manager ID that appears when opening the workspace:
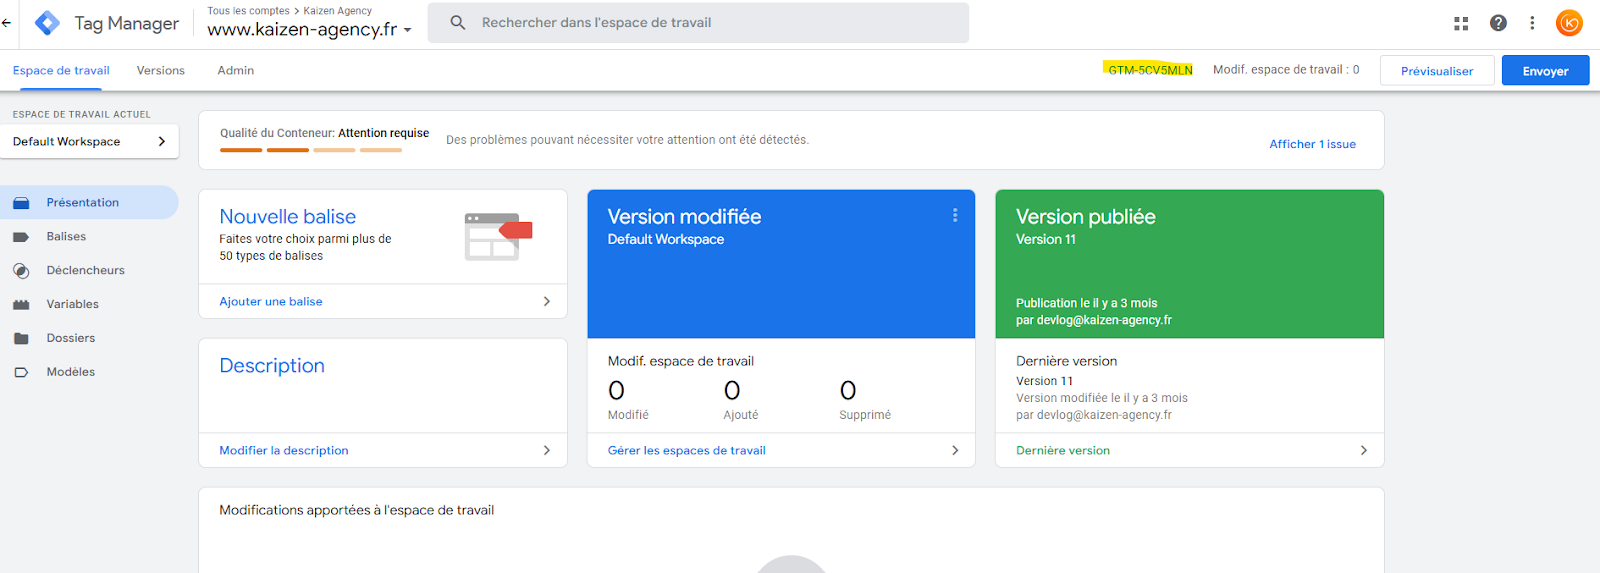
When you click the client's Google Tag Manager ID, a window appears. You will find the code to place in the site <header> as well as the code to add in the site <body>:
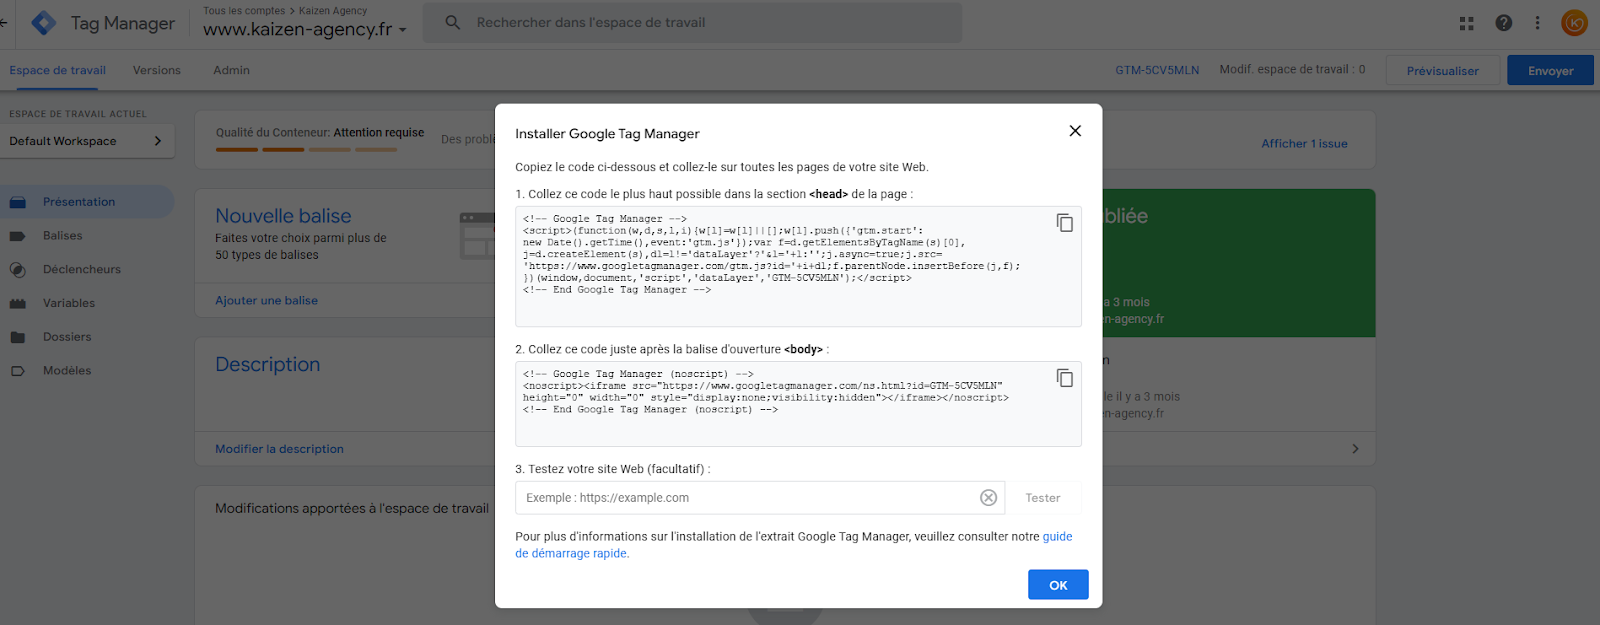
Once these elements are integrated into the site and pushed to production, Google Tag Manager will automatically be visible on the site and available for setting up tracking.
How to create a Google Tag Manager account?
Go to Google Tag Manager:
- Go to the Google Tag Manager website.
- Sign in with your Google account.
Create a new account:
- Once signed in, click "Create Account"
Configure the account:
- Account Name: Enter the name of your company or organization.
- Country: Select your country from the drop-down list.
- Data sharing: You can check or uncheck the boxes to share data with Google.
Configure the container:
- Container Name: The name of the website or app where you will install Tag Manager (for example, "MyWebsite").
- Target platform: Select where you will use GTM (Web, iOS, Android, AMP).
- Click Create after configuring the container.
Accept the terms of service:
- Read and accept the Google Tag Manager terms of service.
Install the code on your site:
- After creating the container, GTM will provide a code snippet.
- You must add this code to your website, typically in the
<head>tag and just after the<body>tag on every page.
Configure your tags:
- Once the code is installed on your site, you can return to Google Tag Manager to configure your tags, triggers, and variables as needed.
- After completing these steps, your GTM account will be created and you can start managing tags without directly modifying your site's code.
How to add a user?
Go to Google Tag Manager:
- Sign in to your Google Tag Manager account.
Go to Admin:
- Select the appropriate account and container if you have several.
- In the interface, click the Admin tab (top left), then the user management tab.
Select the user to edit:
- You will see a list of users who already have access to the account or container.
- Click the row of the user whose permissions you want to adjust.
Edit permissions:
A window opens with options to set or change account-level and/or container-level permissions.
For the account, you can check or uncheck:
- User Management: Allows the user to manage other users.
- Edit: Allows modifications in GTM.
For the container, you can choose different access levels:
- No Access: No access.
- Read: Can only view.
- Edit: Can create and edit tags and triggers, but cannot publish them.
- Approve: Can approve changes but cannot publish them.
- Publish: Can publish changes directly
Save the changes:
- Once permissions are adjusted as needed, click Save.
Creating the Analytics tag in GTM
To create your Google Analytics tag associated with your site in your GTM:
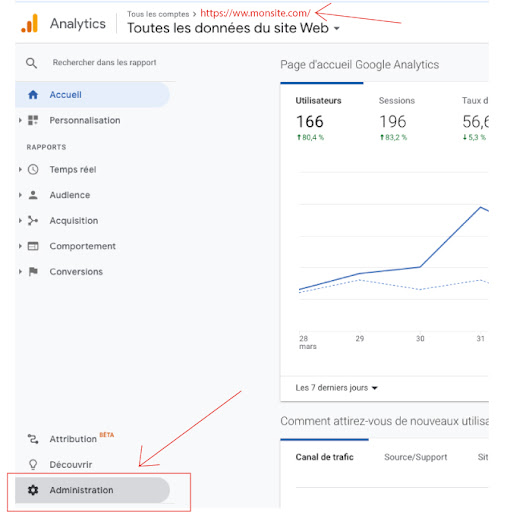
- Go to your Google Analytics workspace
- Choose the account linked to the site for which you want to create the tag
- Click "Admin":
- Click "Property settings":
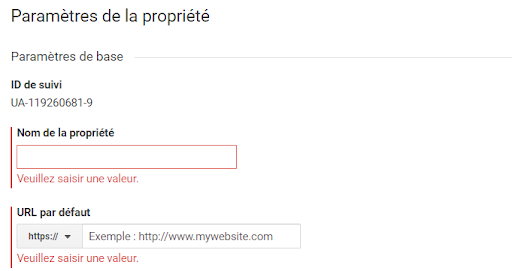
- Copy the Tracking ID
- Open your GTM and go to the "Variables" tab in the left menu
- Create a new variable via the "New" button
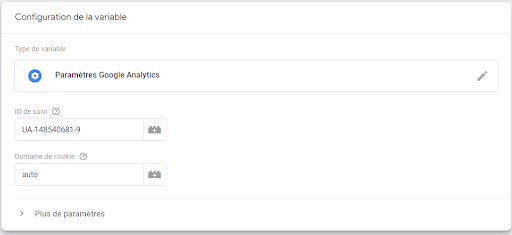
- A pane opens; enter the title of your variable: Google Analytics Settings
- Click in the "Variable Configuration" block
- Select the variable type "Google Analytics Settings"
- Paste the Tracking ID and save
- In the left menu, go to "Tags" and create a new one
“Tag Configuration” block
- For the tag type, choose “Google Analytics: Universal Analytics” if you have a UA
- In the “Track Type” field, leave “Page View”
- And for Google Analytics Settings, choose the variable you just created: Google Analytics Settings
“Triggering” block
- Choose the trigger “All Pages - Page View”:
- Save by clicking the add button and you can submit the changes by clicking the “Submit” button at the top right.
Integrating your Facebook pixel in GTM
To link your Facebook pixel associated with your site, you need to enter your Facebook tag in GTM:
1. Go to your Facebook Business Manager and open "Business settings"
2. In the sidebar, select "Data Sources" and "Pixels":

3. Click your previously created pixel, or create a new one by clicking "Add"

4. Click the button to "Continue pixel setup"
5. Select the "Meta Pixel" and click the connect button
6. Choose the manual option to add the pixel code to the website
7. Copy the entire code:
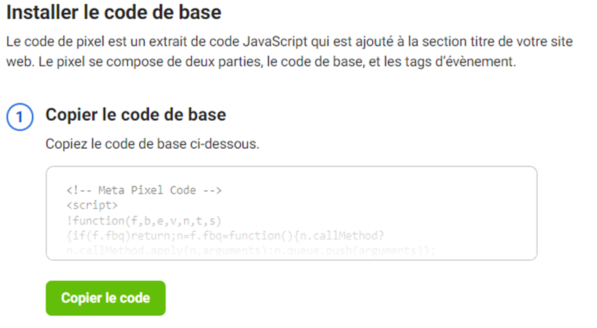
8. Open your GTM and go to "Tags" in the left menu tab
9. Create a new tag via the "New" button
10. A pane opens; enter the title of your tag: Facebook Pixel
11. Click in the "Tag Configuration" block
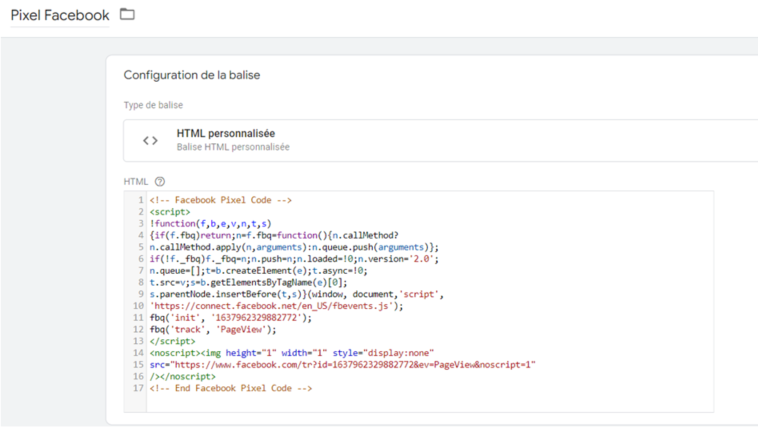
“Tag Configuration” block
1. Select the variable type "Custom HTML"
2. Paste the code provided by Facebook
“Triggering” block
1. Choose the trigger "All Pages - Page View":

2. Save by clicking the "Save" button
3. and you can submit the changes by clicking the "Submit" button at the top right.